UPDATE: Due to the high traffic on this post, I’ve compiled all of the screenshots into a gallery at the bottom so that it’s easier to scroll through. Jump down to the bottom if you’re here for a reference.
Hello hello, one and all. Yesterday was an exciting day over here, as my Play-Asia package arrived!

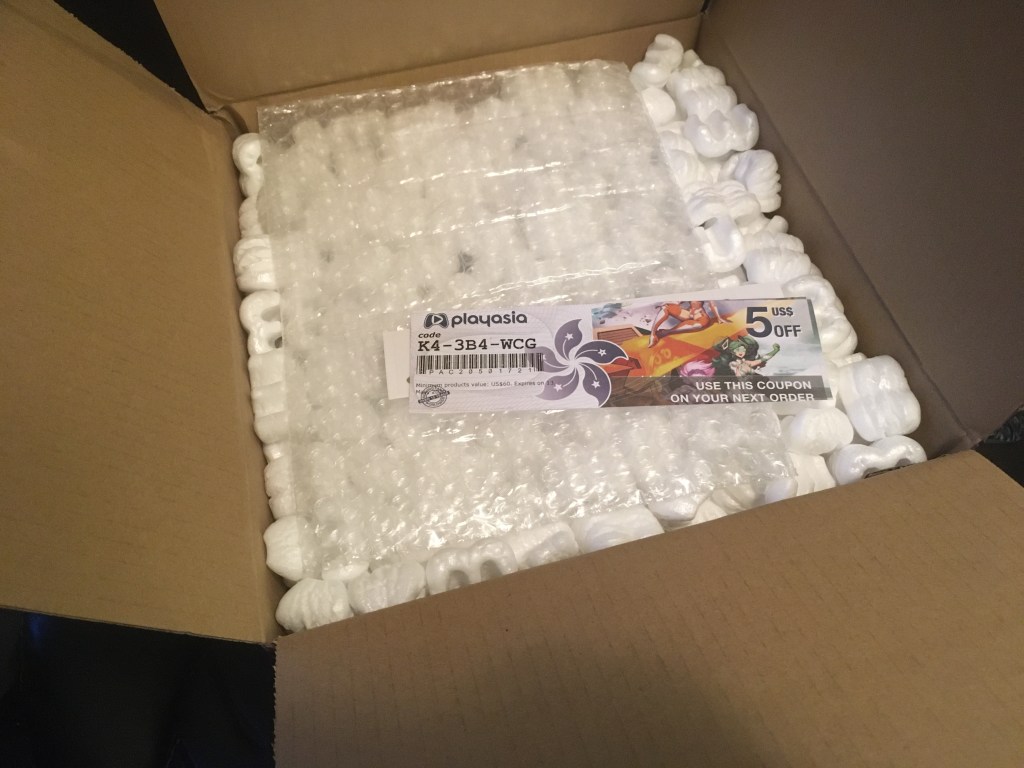
Free $5 coupon to whoever sees this! 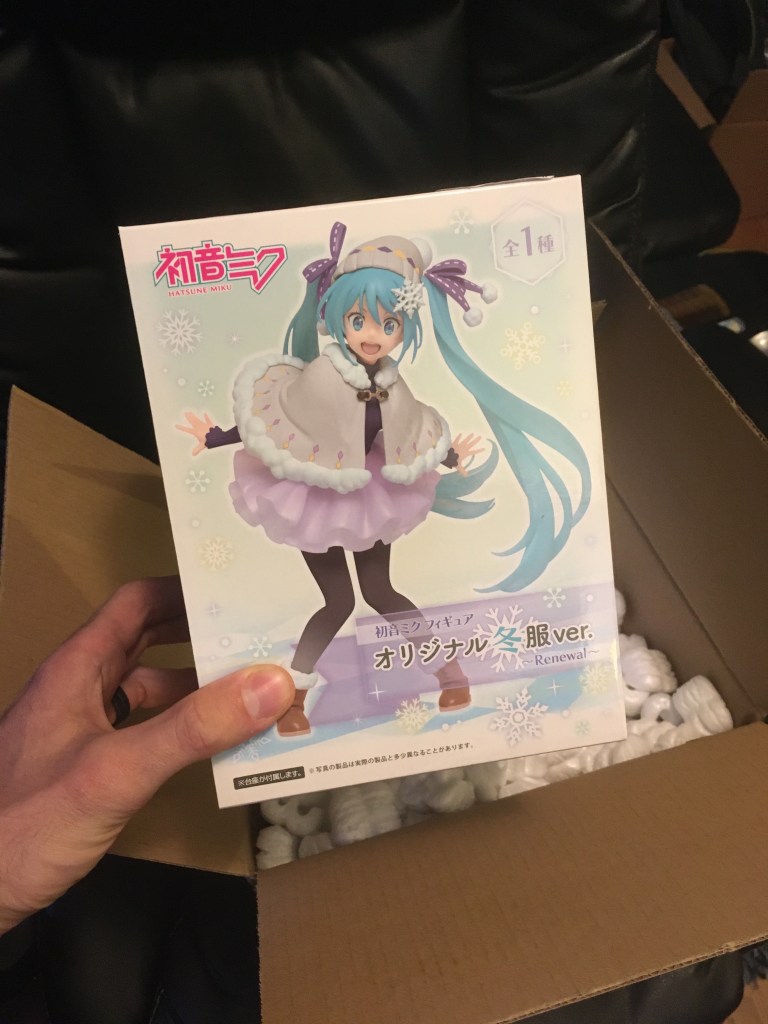

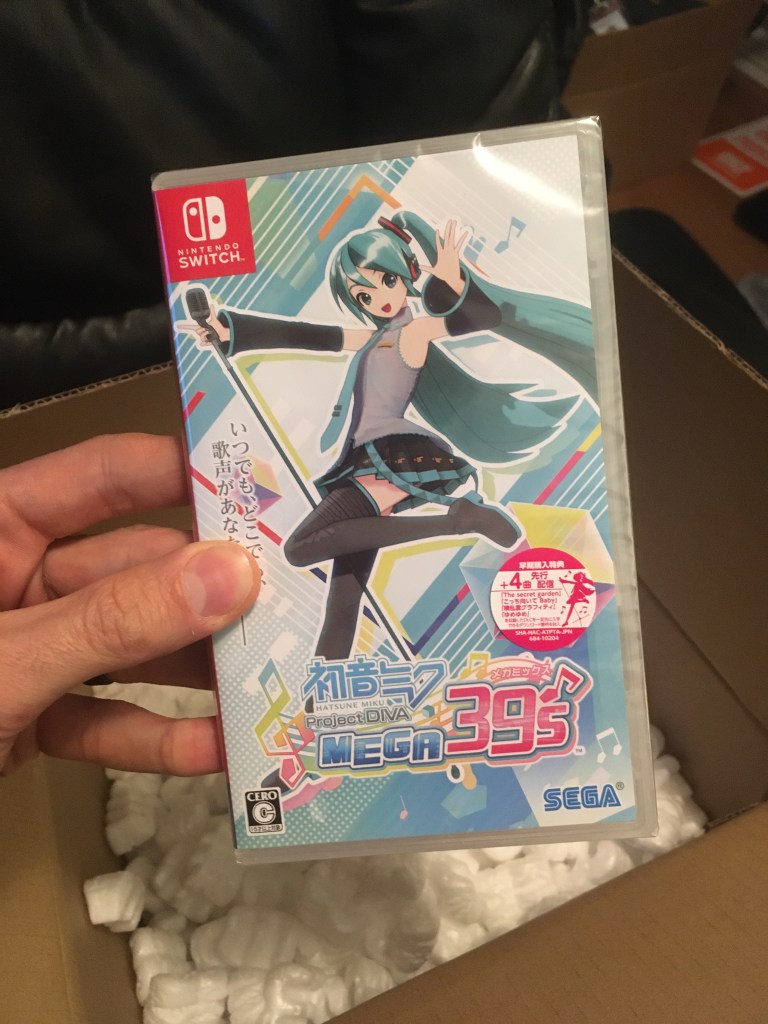
To skip to the meat of the article, today I’m not here to gush about Project Megamix – what I’m here to do is set up a quick and dirty guide to the translated menus to help people like myself who couldn’t wait for the English version later this year, and also do not read Japanese.
Let’s not waste any time, because to be honest I’m doing this right now instead of playing, which is not nearly as fun!
A Tip Regarding Input Lag
This is the first Miku game I’ve played on a television, which introduced all sorts of weird input lag that I wasn’t used to. This guide will have a section specifically for fixing this issue in-game (by that I mean, I translated the menu), but what fixed my issue permanently was putting my HD TV into Game Mode. If you’re unfamiliar with Game Mode on modern televisions, it reduces the amount of image post-processing so that there is as little latency as possible between receiving an HD video signal, and displaying it on your TV.
This helps because otherwise your button presses will need to be completely ahead of schedule, which makes the rhythm game extradinarily difficult to play. So, if you’re having latency issues, do this first. It basically solved my entire input lag problem instantly. It also made me realize why I’d been getting my ass kicked in Monster Hunter Generations Ultimate while playing on my TV…
Menu Translations
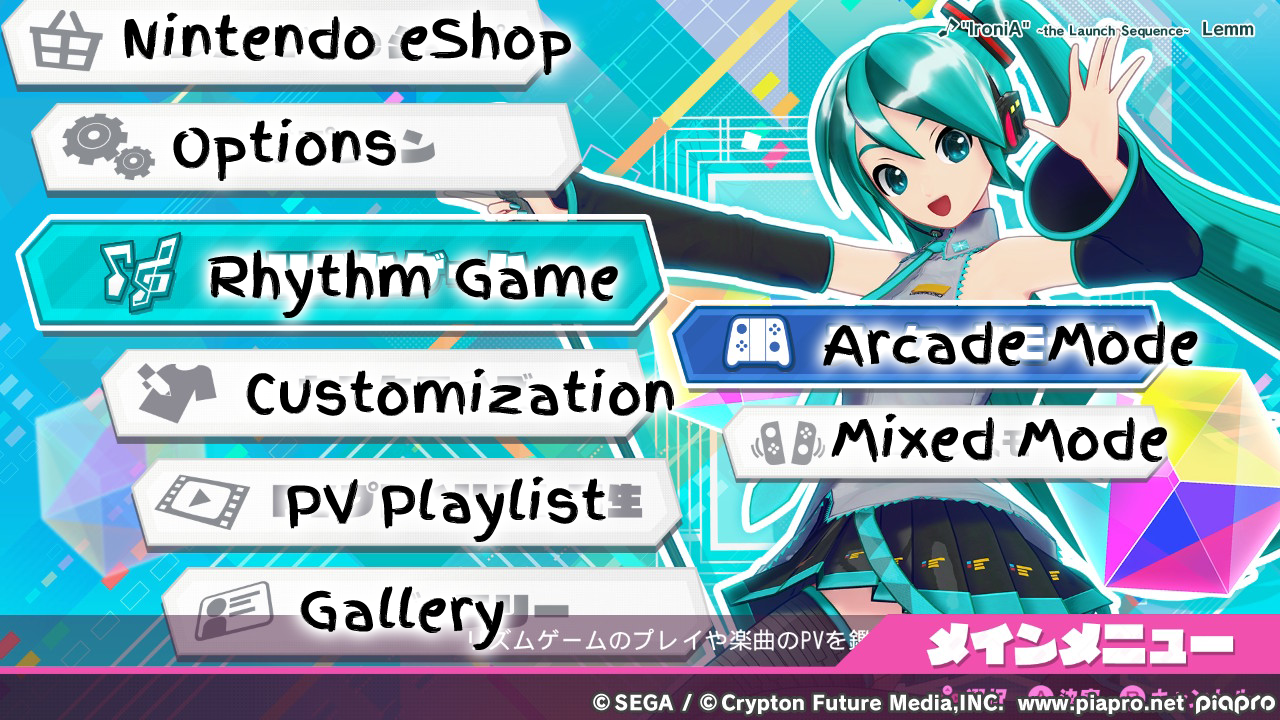
Main Menu
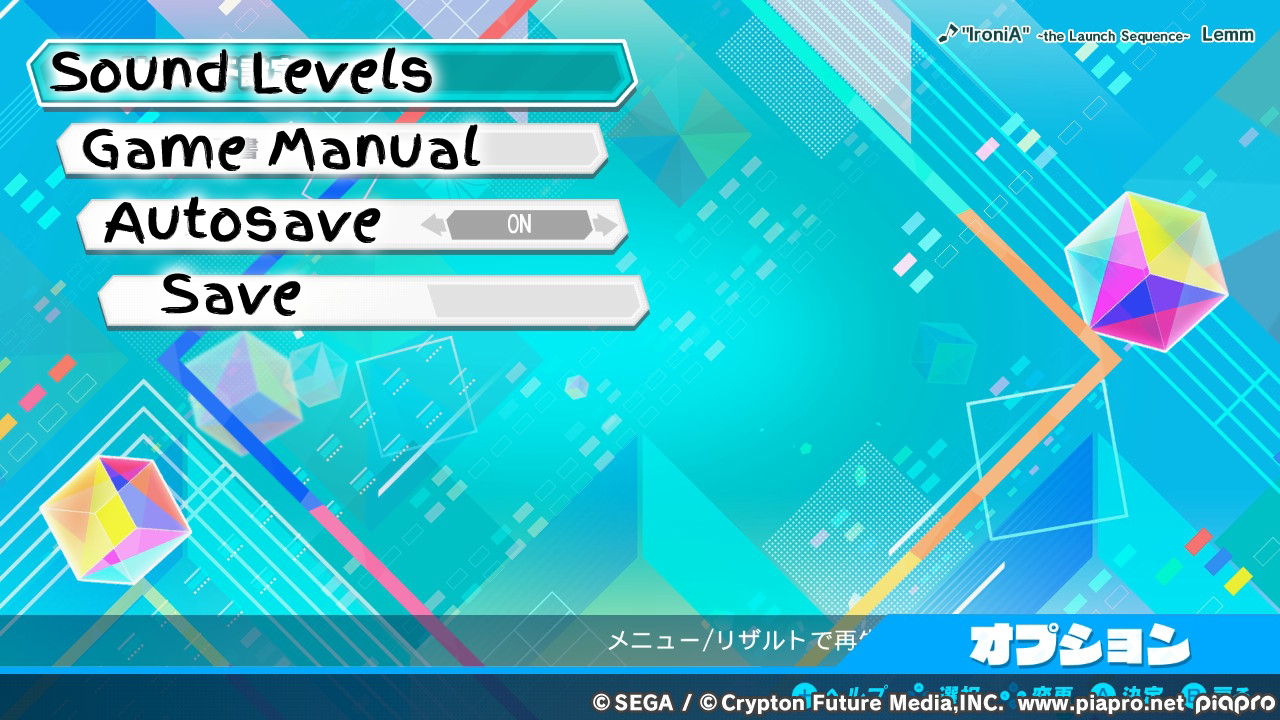
Options
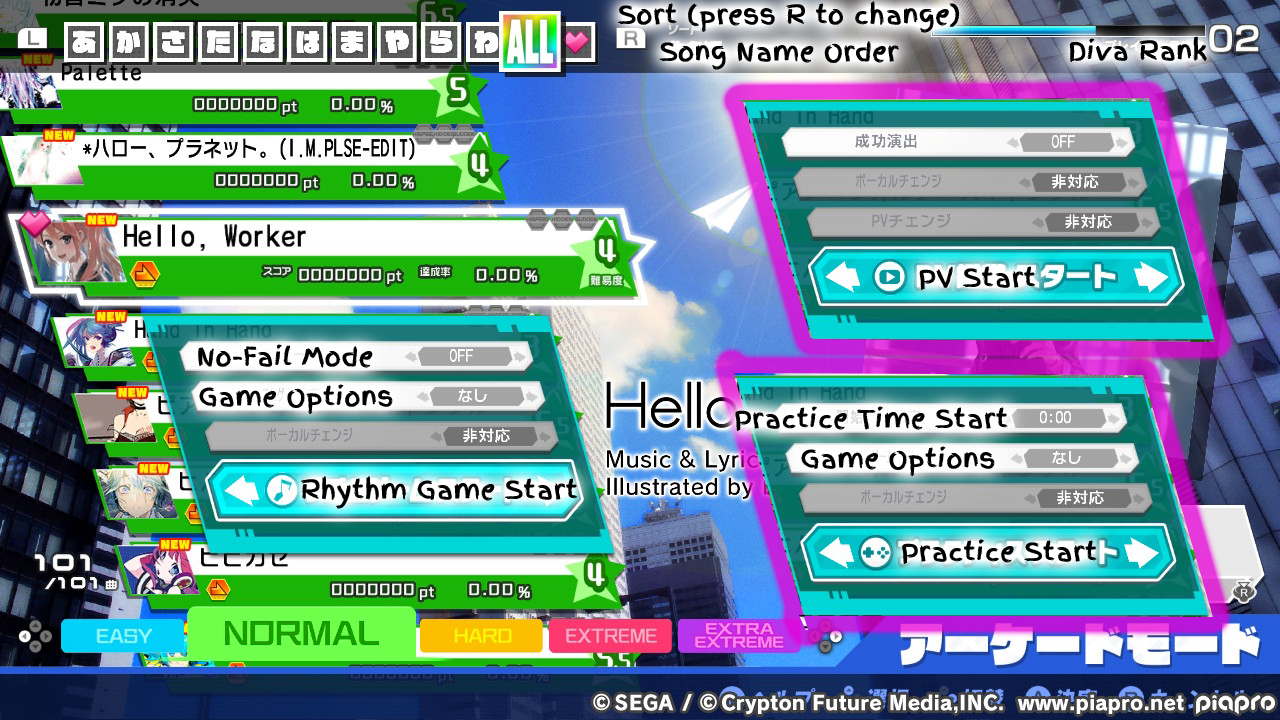
Rhythm Game Song Select

Song Select Options
Once you select a song, you can press < and > to change play modes between regular rhythm game, PV (where you can watch the video), and Practice Mode (where you can start the song at a certain time, go back, etc).
Playing the Game
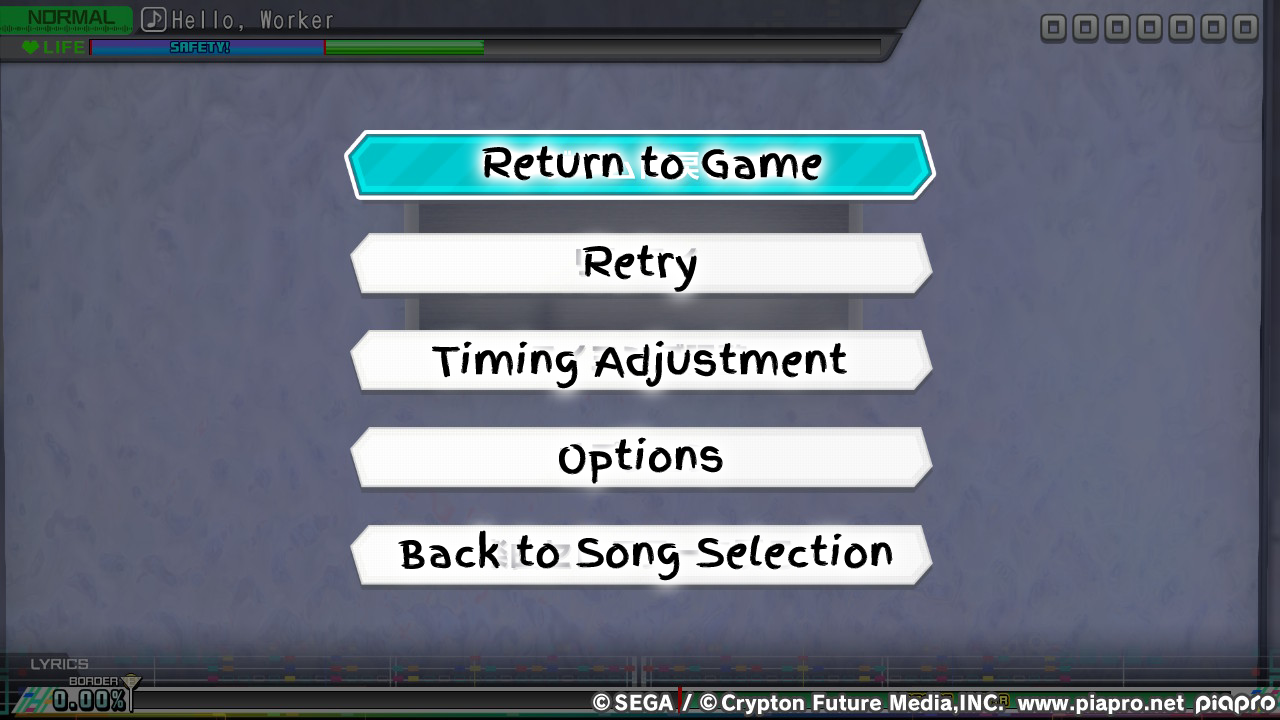
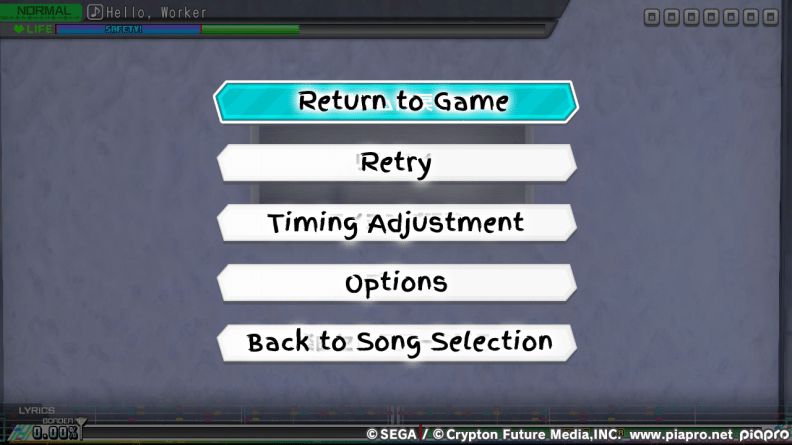
Pause Menu
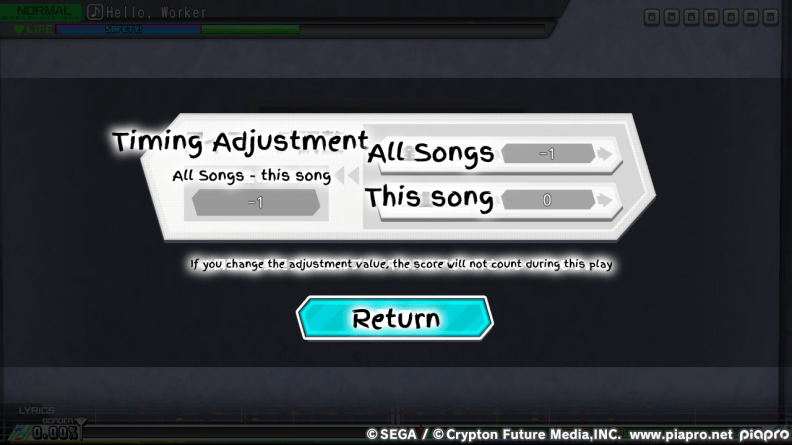
Timing Menu

Heads up – don’t mess around too much with this until you’re sure your television is in Game Mode, if it has one. Basically the way that this screens works is that you can delay your input on the top option for all songs in the game. The bottom selector is a secondary adjuster for the current song only. The left side will show your base adjustment plus or minus any custom changes for the current song. As some songs simply have different recording times, this may be necessary to fine tune.
Clear Screen
Retry Menu
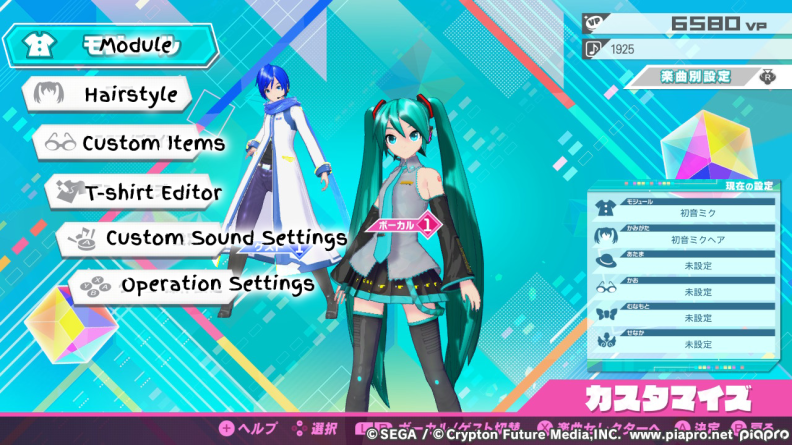
Customizer
From the Song Selection screen, press X to move to the customization screen, as seen below. The Module, Hairstyle, and Custom Items menus are fairly self explanatory. You can also toggle between your presets with R3.

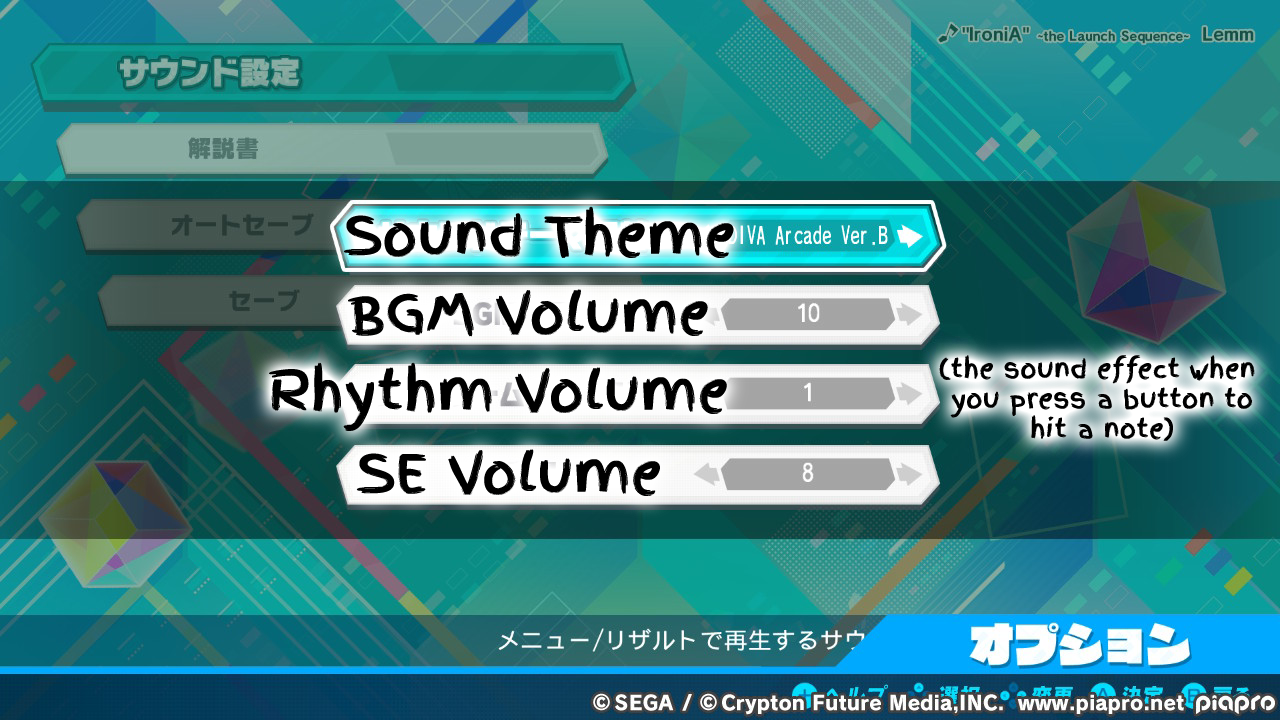
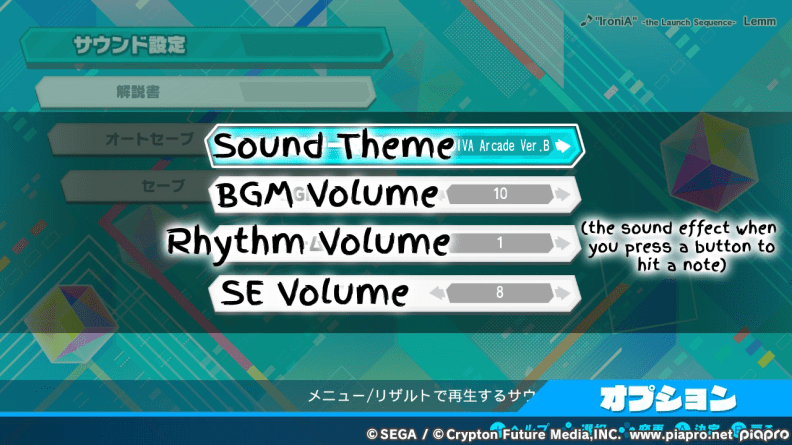
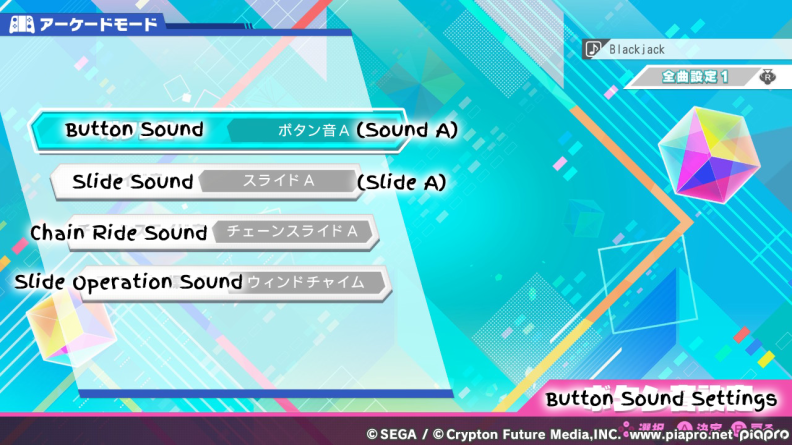
Custom Sound Settings

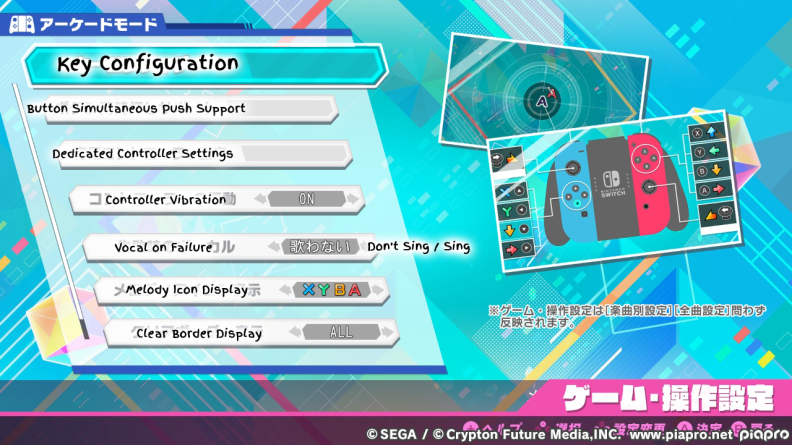
Operation Settings

I’m not 100% sure what all of these are. Some are self explanatory, but the others, not so much. Vocal on Failure is an option I could see some liking to change. By default the vocaloid audio will cut out if you miss a note, but you can turn this off here. You can also change the icons.
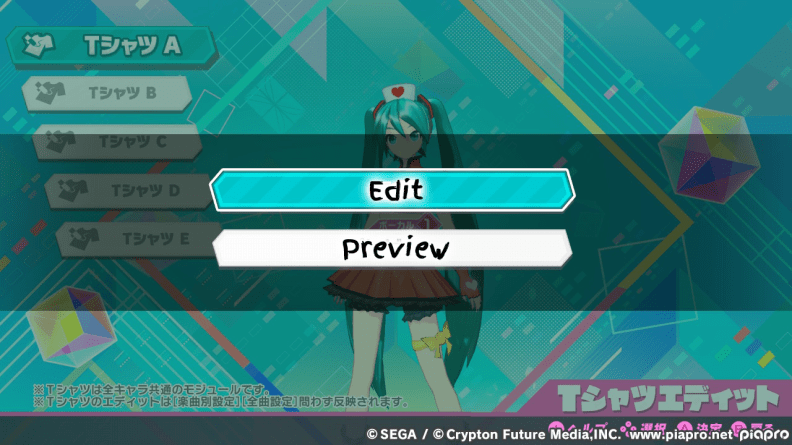
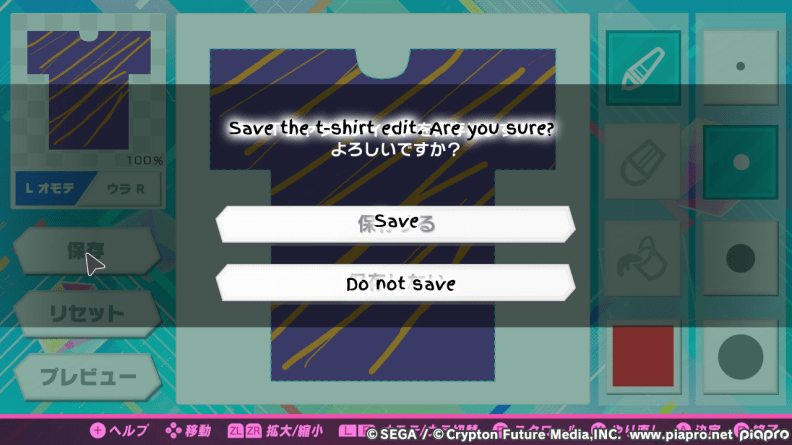
T-shirt Editor
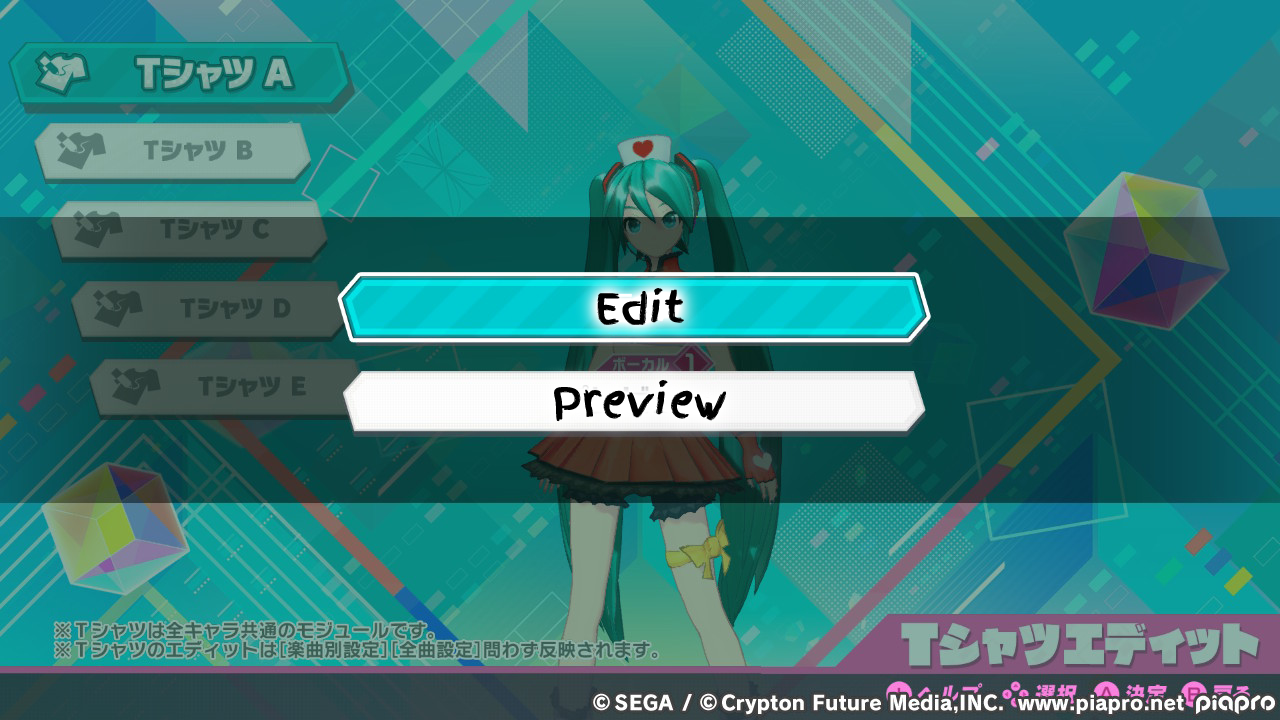
When you first open the editor menu, you can choose from custom shirts A through E. Press A and it’ll ask you whether you want to Edit the shirt, or Preview what it looks like.
T-shirt Editor Functions
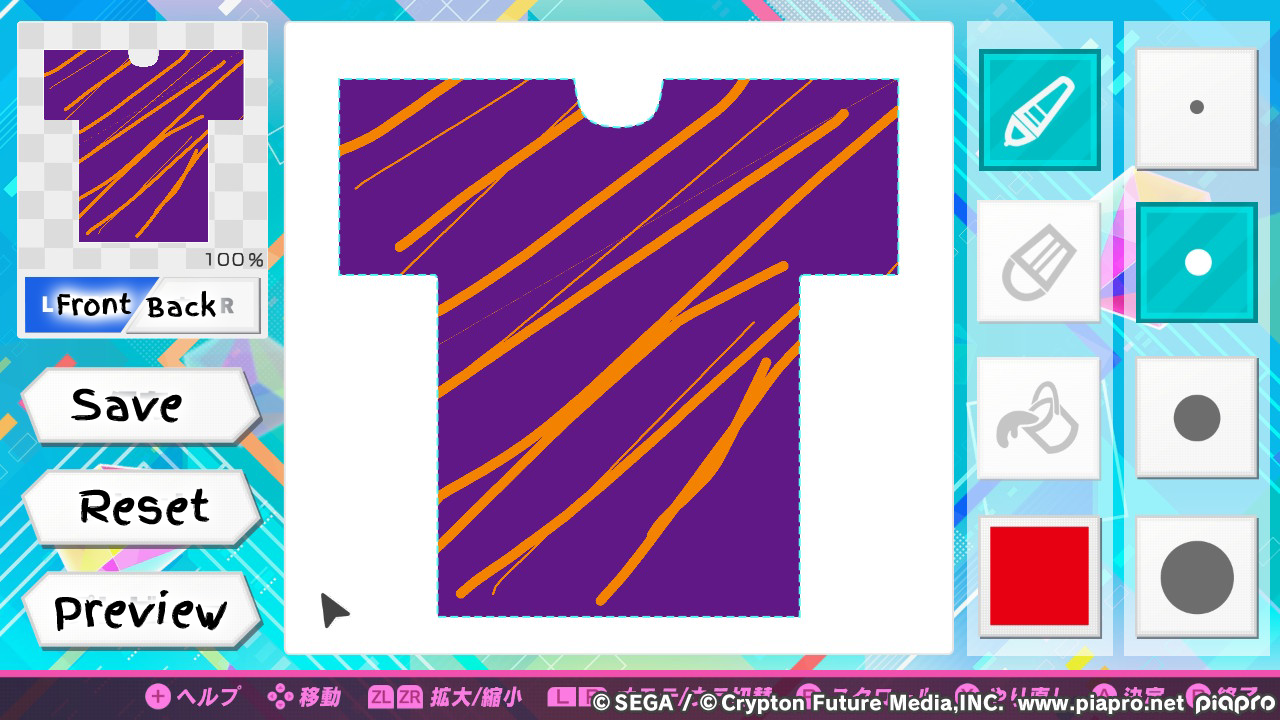
Use L/R to switch between the front and back of the shirt, and the Save/Reset/Preview options in the bottom left.
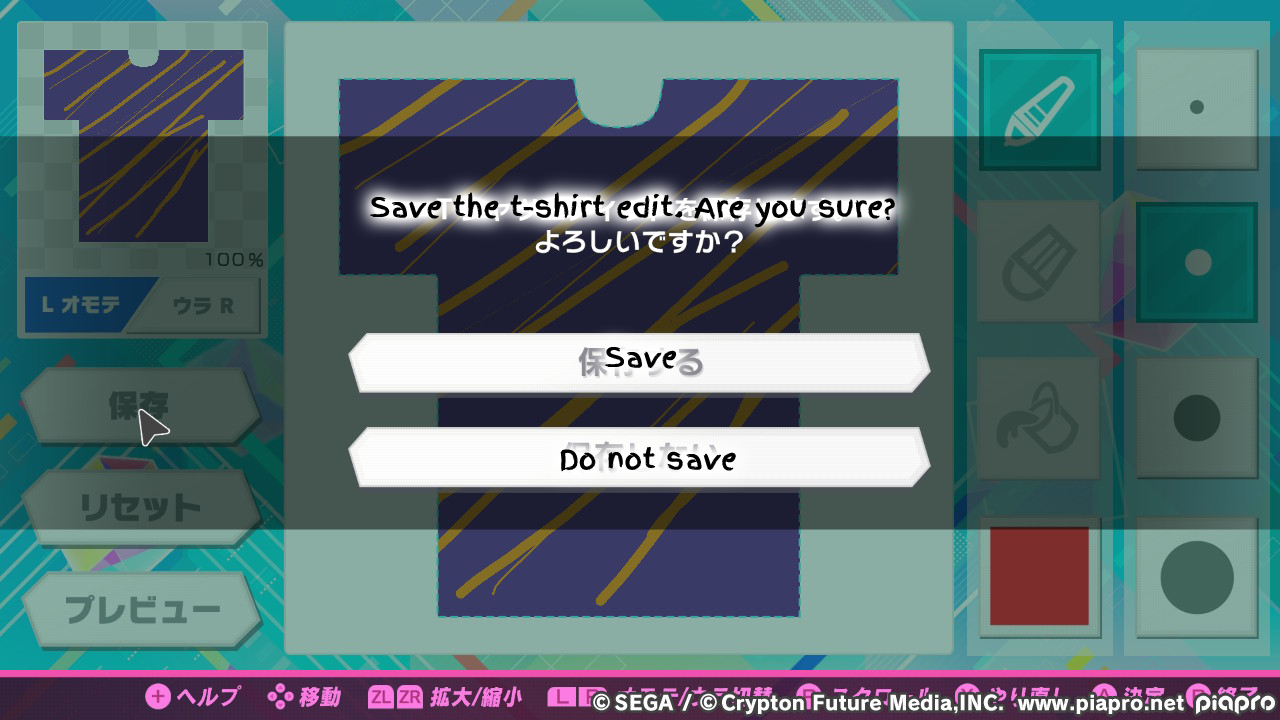
Save Button
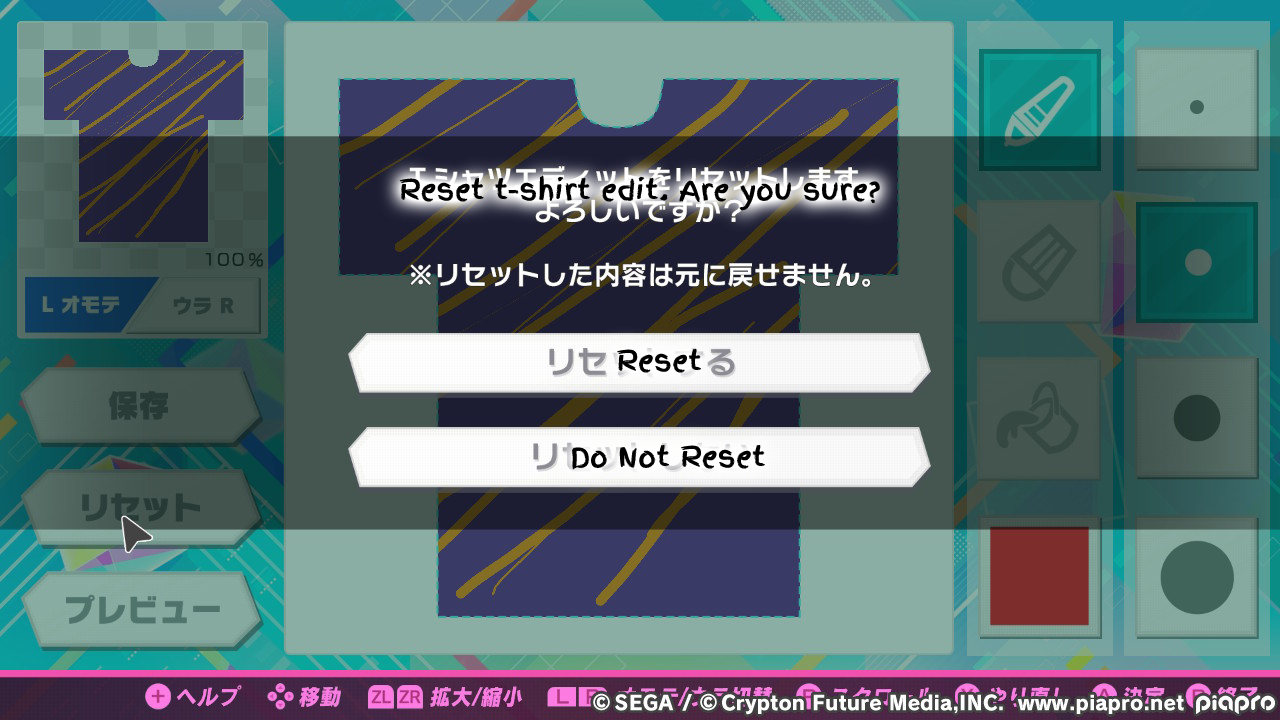
Reset Button
And of course, the Preview button shows off your new creation.
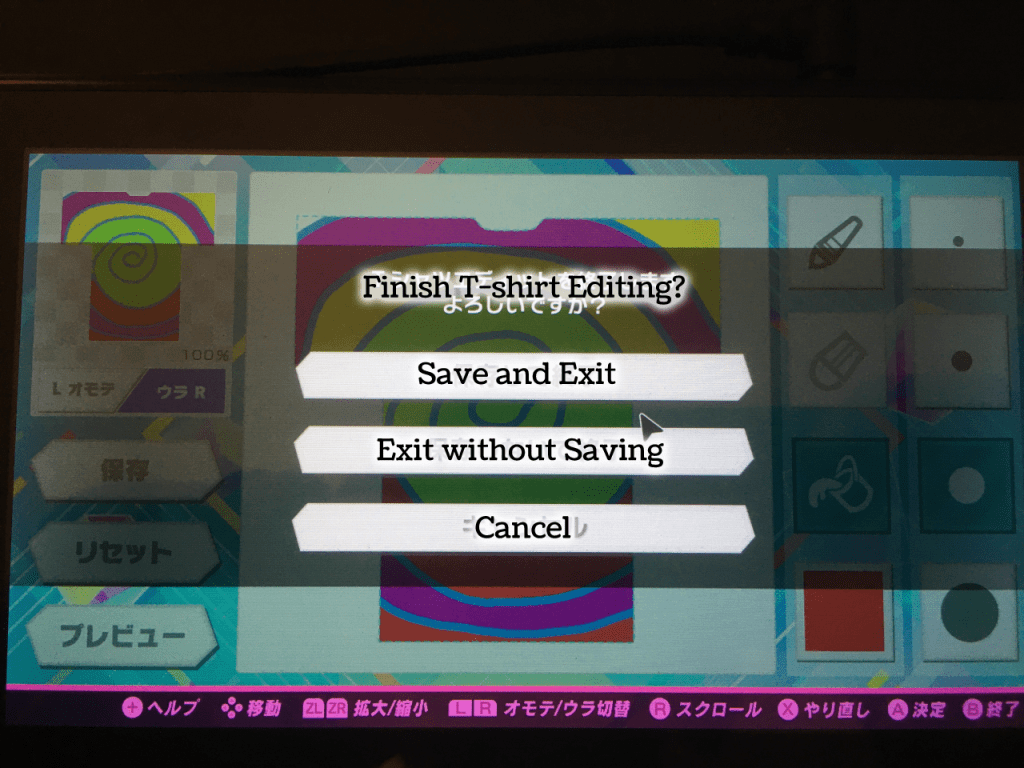
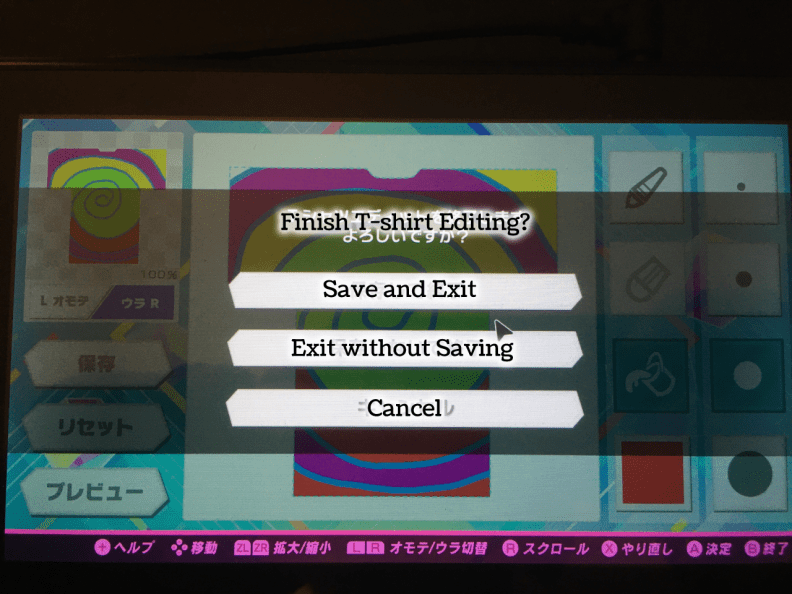
Quit T-Shirt Editor
When you press B, it will try to take you back to the custom t-shirt selection screen. It will give you three options:
I hope this helps someone out there! This of course is by no means meant to be a full Japanese translation – I merely used the Google Translate app with the camera functionality to translate it live. But hopefully this can help someone as a reference.
I’d love to chat more, but I’ve got some J-pop to listen to and some buttons to mash. Cheers!


[…] last post went crazy with traffic, and it dawned on me that there is quite a thirst for us […]
LikeLike